With many purchased plastic pumpkins and decorative lights, you can make your own plastic pumpkin archway for your home this upcoming Halloween.
Imagine a fusion of CandyLand’s whimsy with the spooktacular charm of Halloween, and you’ll get a vivid mental picture of the fantastic project we’re about to embark on: crafting your very own DIY Jack-o-Lantern Archway.
This endeavor is not only an absolute breeze but also promises to be the highlight of any kid’s party or a captivating addition to your Halloween decorations.
So, get ready to dive into the festive spirit and follow these simple steps to bring your Jack-o-Lantern archway to life!
Hometalk Recommends!
Make your own Jack-O-Lantern archway with these recommended pumpkin buckets that Amazon reviewers swear by!
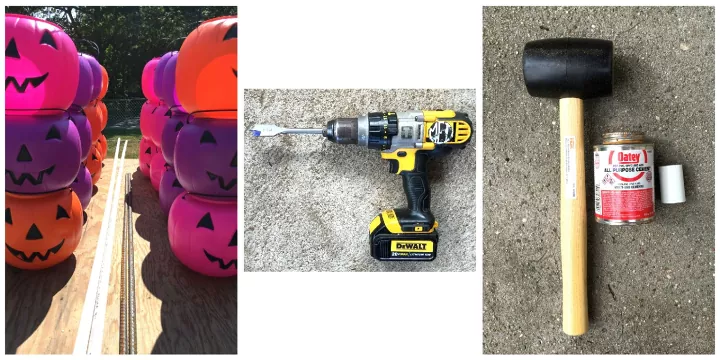
To embark on this creative Halloween journey, you’ll need to gather the following supplies:
Tools and Materials:
- 30 plastic pumpkin buckets
- (2) 10’x1/2″ PVC pipes
- (1) 1/2″ PVC coupler
- (2) 4’x1/2″ rebars
- drill
- 7/8″ paddle bit
- Rubber mallet
- all-purpose cement (for PVC)
Note: the PVC pipe, coupler, and all-purpose cement can be found in the plumbing aisle at most hardware stores.
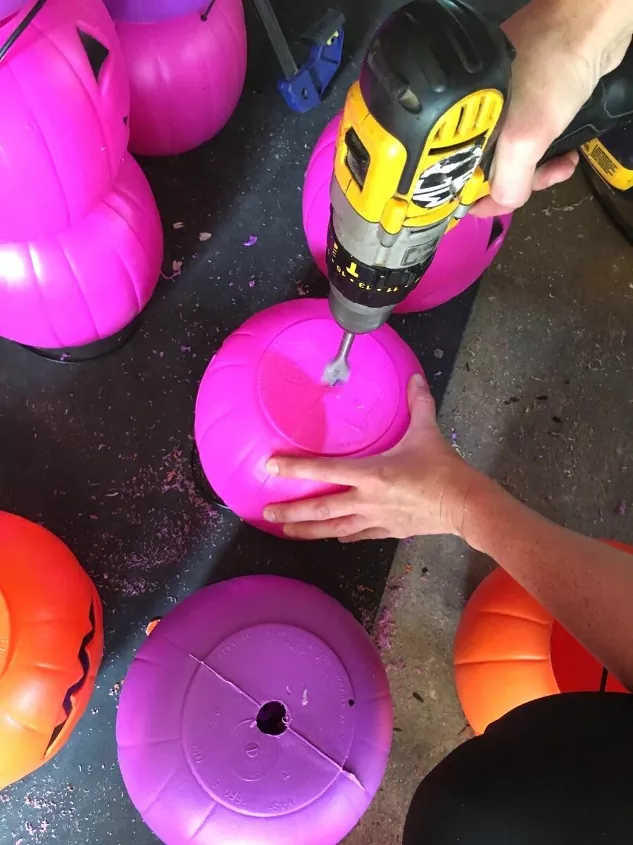
Drill a hole in the bottom of the pumpkins
1. Preparing the Pumpkins
The first step involves creating holes in the bottom of the pumpkin buckets.
Using a 7/8″ paddle bit, carefully drill a hole in the bottom of each pumpkin. In most cases, the pumpkins may already have a small hole, providing a convenient starting point for your paddle bit.
Halloween yard decoration
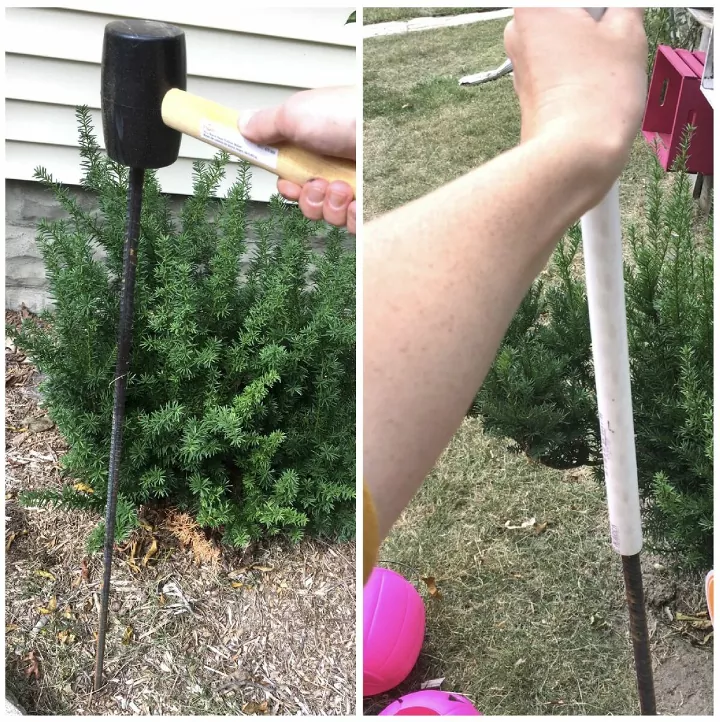
2. Setting the Foundation
With your pumpkins ready, it’s time to prepare the foundation for your archway.
Use a rubber mallet to gently hammer the rebars into the ground on both sides of your front stoop. Ensure that the rebars are firmly grounded for stability. Next, slide one of the PVC pipes onto the rebar on one side of the stoop.
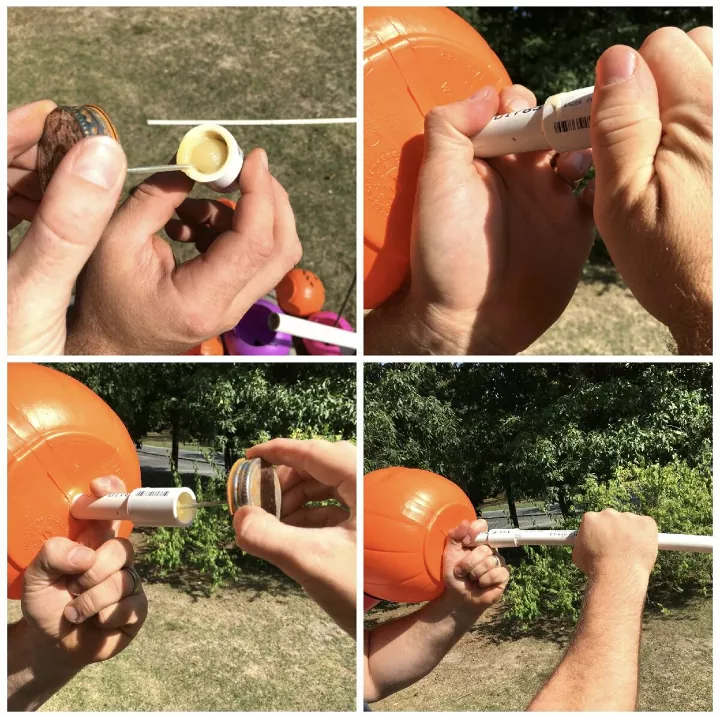
3. Assembling the Arch
The magic continues as you assemble the archway. Slide the pumpkins onto the PVC pipe with a helping hand. When you reach the end of the first pipe, use all-purpose cement to securely connect the coupler, then attach the second PVC pipe.
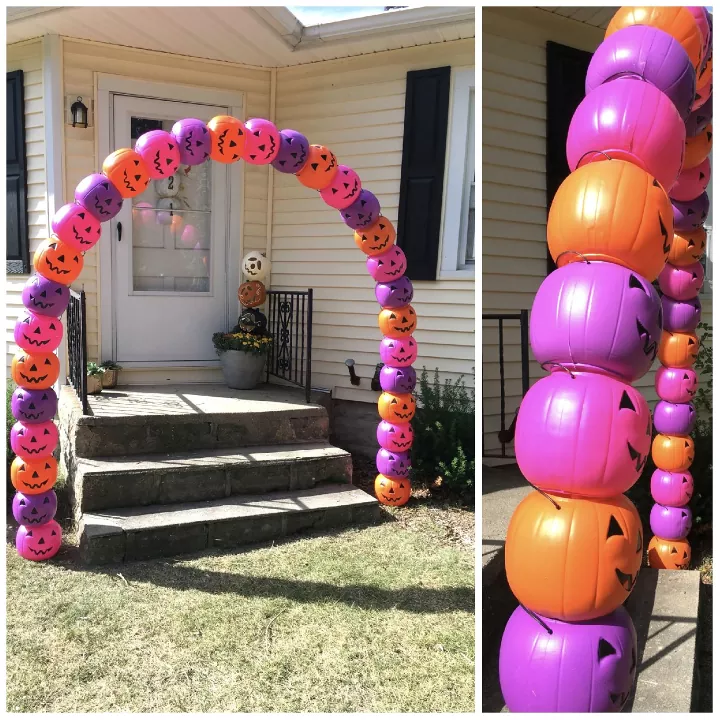
With both PVC pipes in place, continue adding pumpkins until your archway blooms with the allure of illuminated Jack-o-Lanterns.
To ensure a neat finish, trim any excess pipe (typically around 23″) using a hacksaw.
DIY Jack-o-Lantern Archway
Halloween Jack-o-Lantern Archway
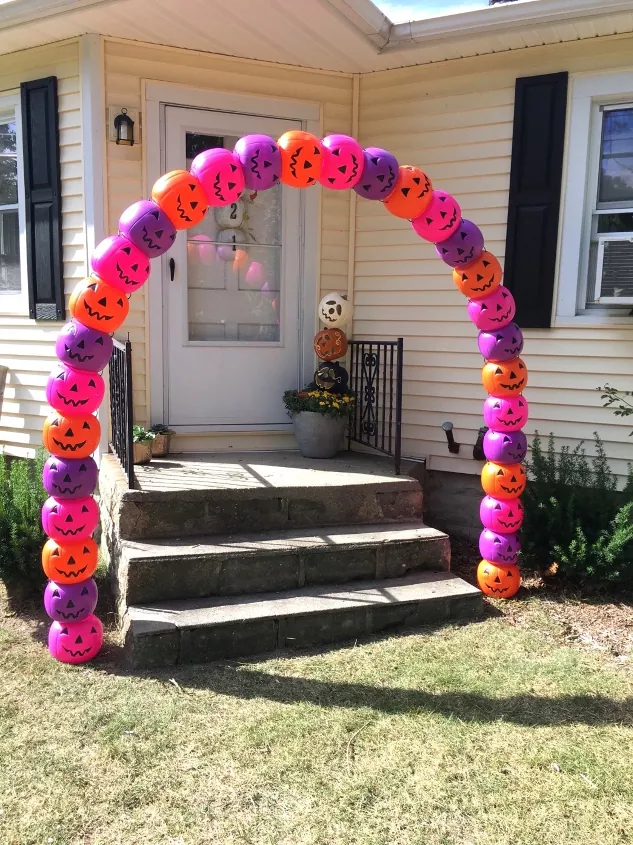
With just three straightforward steps, you’ve crafted a fun DIY Jack-o-Lantern Archway that promises to be the talk of the town.
Want to add an extra dash of enchantment? Consider stringing outdoor lights to illuminate your creation.
We’d love to hear about your Jack-o-Lantern Archway journey! Did you make any creative modifications or encounter any delightful surprises along the way?